• HOME
  • ABOUT
    • PRIVACY
    • DISCLOSURE
    • TERMS & CONDITIONS
  • Get in Touch

Always Made With Love

  • DIY / Crafts
    • DIY
    • CRAFTS
    • CELEBRATE
      • EASTER
      • CHRISTMAS
      • PARTIES
  • Lifestyle
    • ACQUISITIONS
  • Motherhood
  • Kids
    • BABY
    • TODDLERS
    • KIDS CRAFTS / ACTIVITIES
  • Food

DIY Pillowcase Wall Art

October 22, 2015 by lydiaritchie 17 Comments

diy-pillowcase-wall-art When putting Sebastian’s NEW Transport Inspired Bedroom together something which I struggled to find that I absolutely loved was wall art. I either found pieces which were not quite right for the look and feel of the room or they were ridiculously expensive and there is no way I was going there for a bit of artwork to be displayed on the wall of my toddlers room for a couple of years.

So, after weeks (possibly months) of searching and pinteresting, I decided to make my own (at this point I still had no idea what or how I was going to do this) but I figured I would have more luck!?! Then one afternoon, whilst talking to my Mum (I totally can not take credit for this brilliant idea), she suggested using the pillowcase from the duvet set. As you may or may not know I fell in love with his duvet cover immediately and it fitted the decorating brief for his room perfectly – bright, bold, happy and fun.

The humble pillowcase which would have gotten lost on his bed amongst all the other pillows and cushions was going to be given a makeover and has now been transformed into a great piece of wall art sitting pride of place above his bed. The best part it totally goes with & makes his room AND it barely cost me anything as I had most of the other bits lying around home waiting to put to good use.   

diy-pillowcase-wall-art
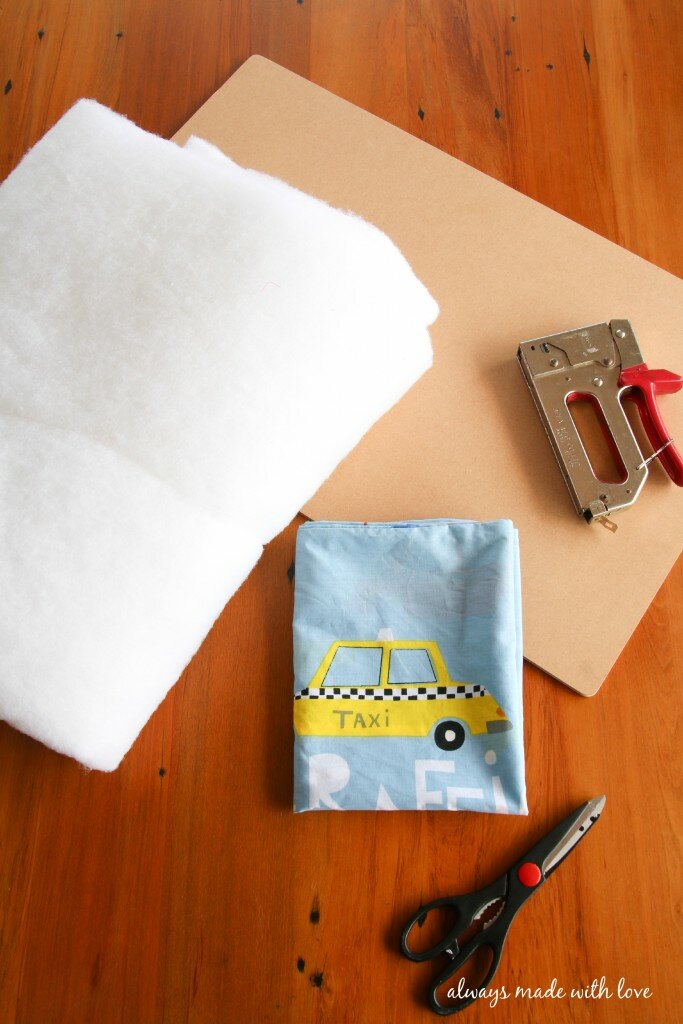
To create your own DIY Pillowcase Wall Art you will need:

  • Pillowcase of choice
  • Wood – approx. 5mm thick ( you could always use canvas if you prefer)
  • Sand paper
  • Quilt Batting, I choose a polyester blend as it is cheaper and only going on the wall (you will need enough to cover your piece of wood/ canvas twice)
  • Gun Stapler
  • Scissors
  • Picture hanging fastenings (we used a couple of little eyes and wire)
  • An extra pair of hands, I used my Mums 😉diy-pillowcase-wall-art
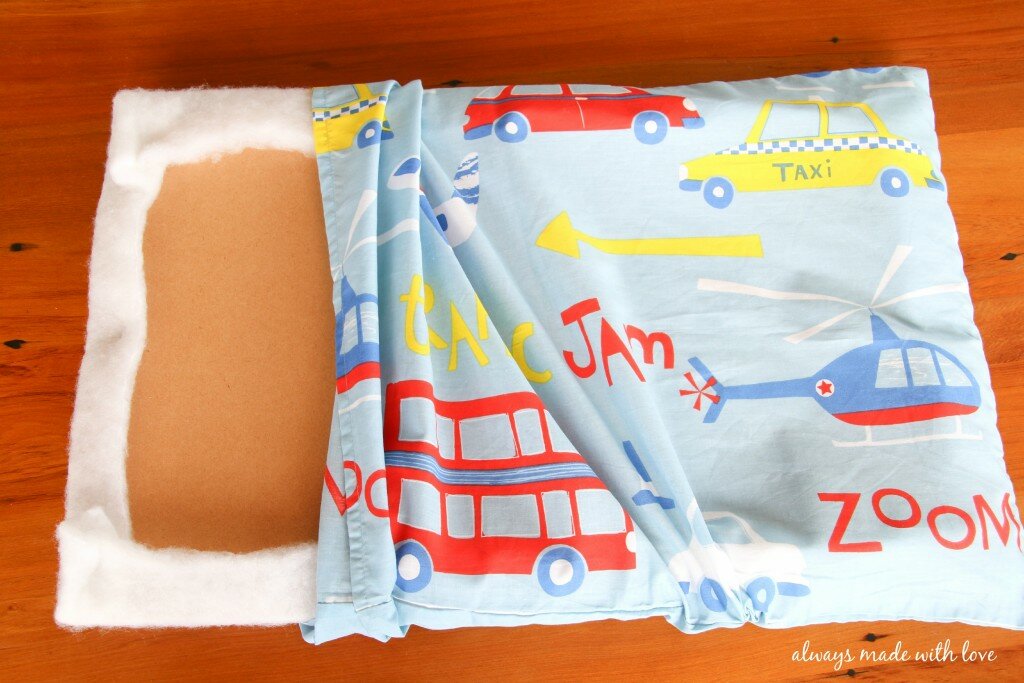
  1. Cut your wood to your preferred size. I was happy for it to be just a bit smaller than the pillowcase ( 43 cm x 70cm) itself as it is the only art work going up on that particular wall at this time. Once you have your piece of wood the right size you need round the corners off, ever so slightly and give all the edges a light sand. This will ensure that the wood itself doesn’t cut through the quilt batting and pillowcase.diy-pillowcase-wall-art
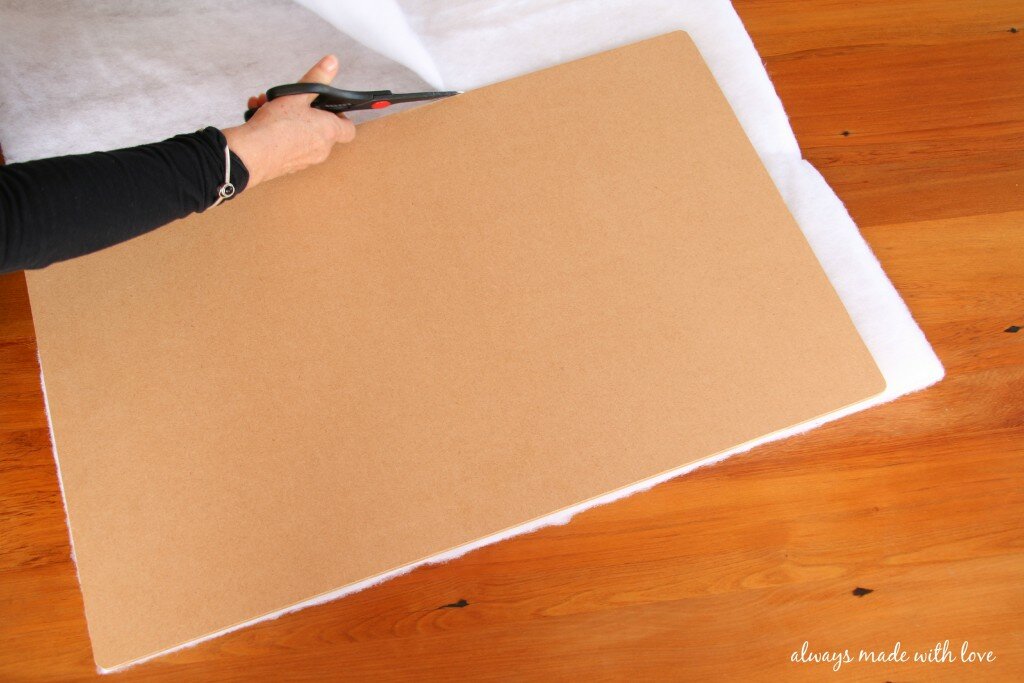
  2. Cut yourself two pieces of quilt batting – making one piece roughly the same size as your piece of wood (use the wood as a marker) and the other piece approximately 3cm bigger the whole way round. Near enough is ok, you don’t need to go and measure it exactly. diy-pillowcase-wall-art diy-pillowcase-wall-art diy-pillowcase-wall-art
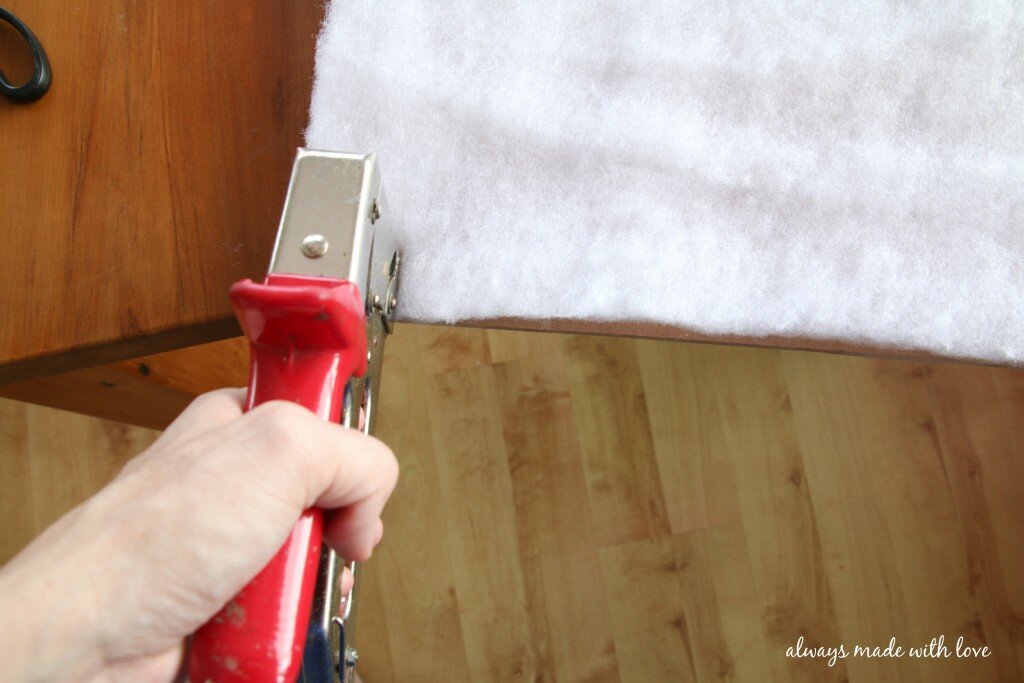
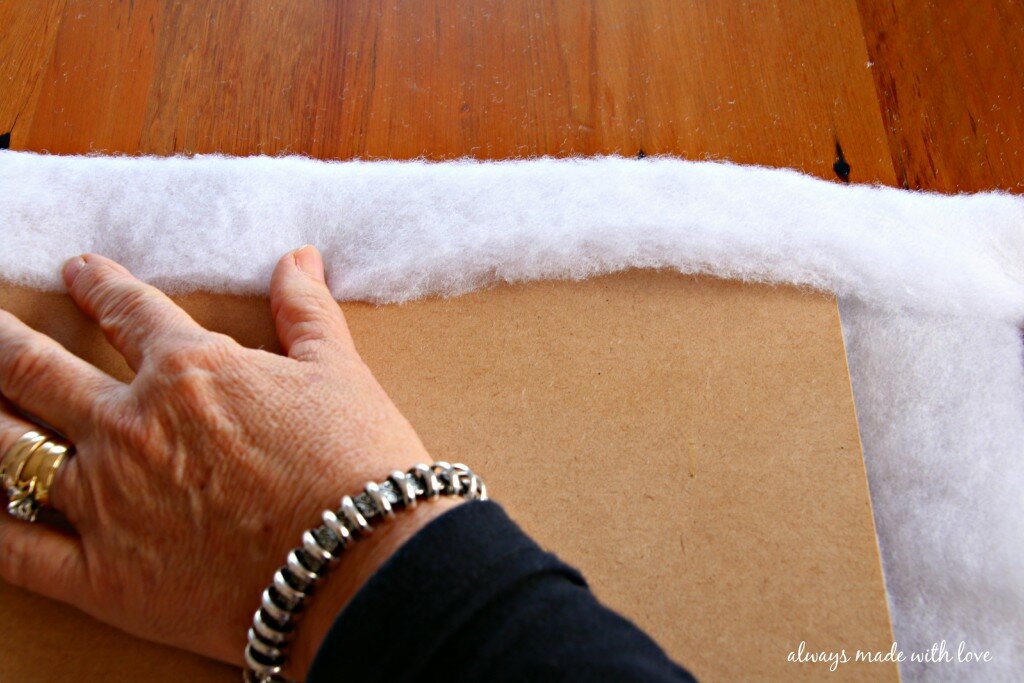
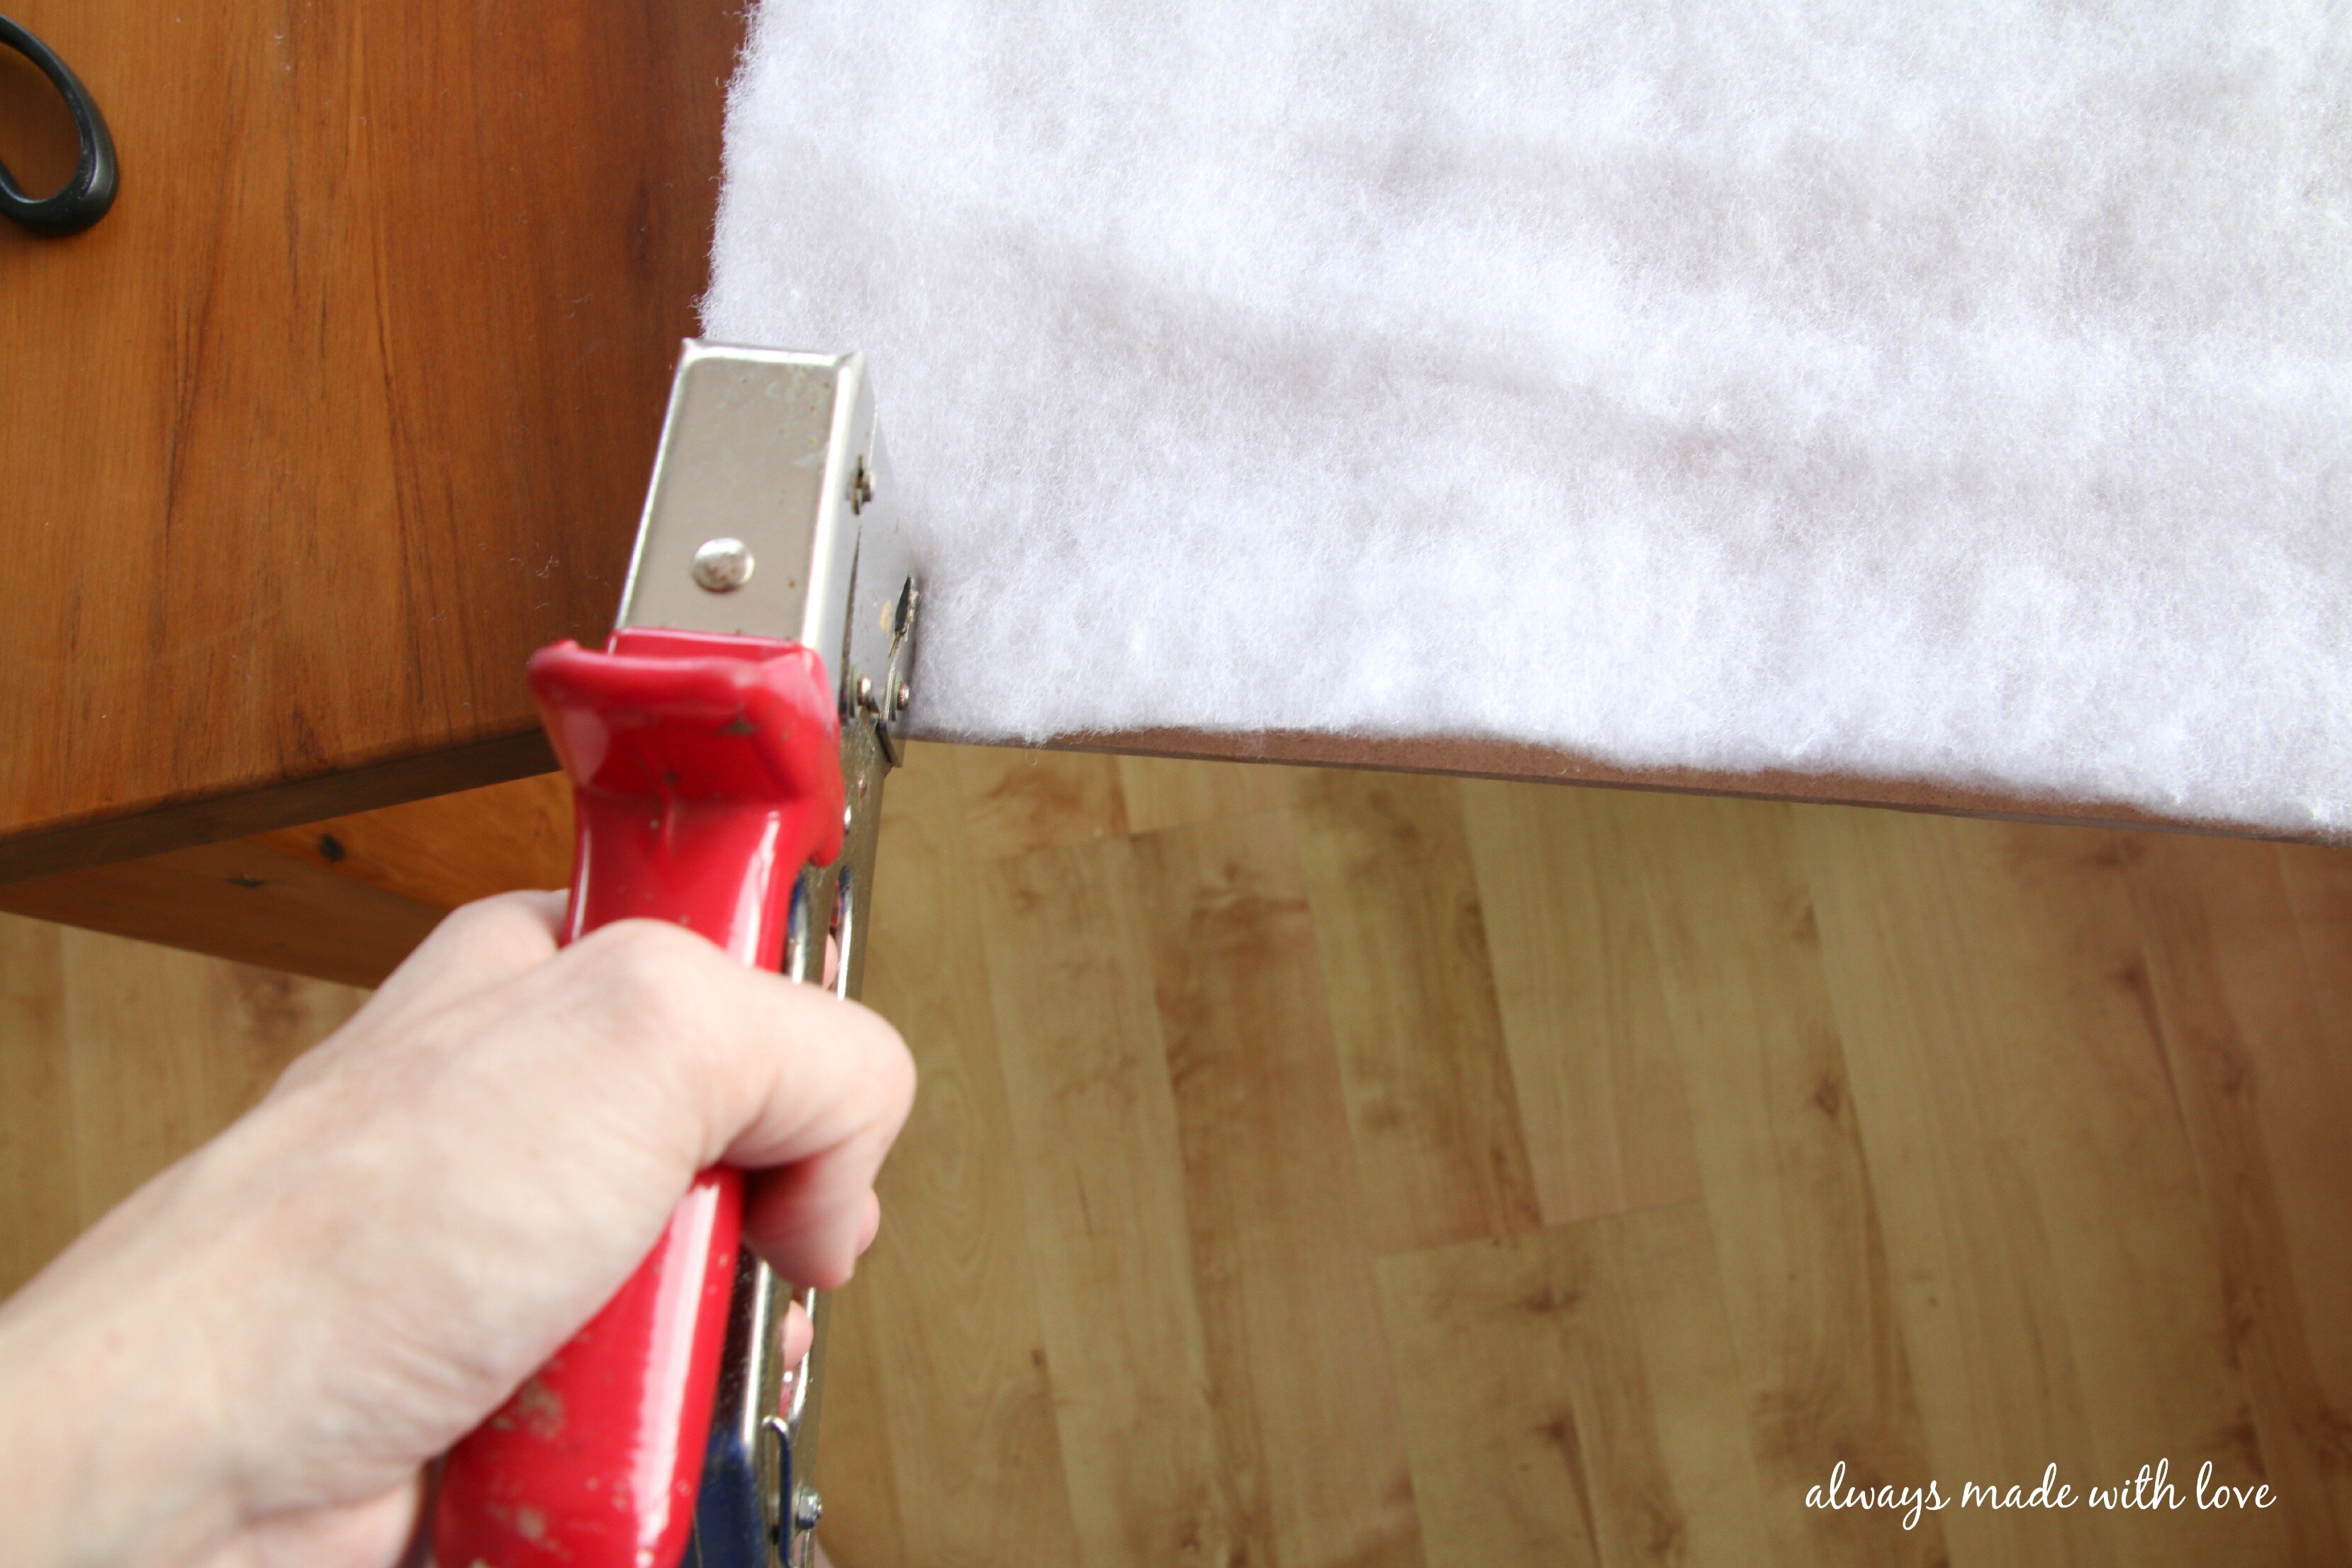
  3. Take your first piece of batting (the one the same size as your wood/ canvas) and staple it to the wood, just in the corners is enough. Here is where you start to need a second set of hands.. Place your piece of wood in the middle of your second piece of batting and we started on the shorter sides – fold the batting over, pulling tight and then staple. Repeat on the longer sides. diy-pillowcase-wall-art
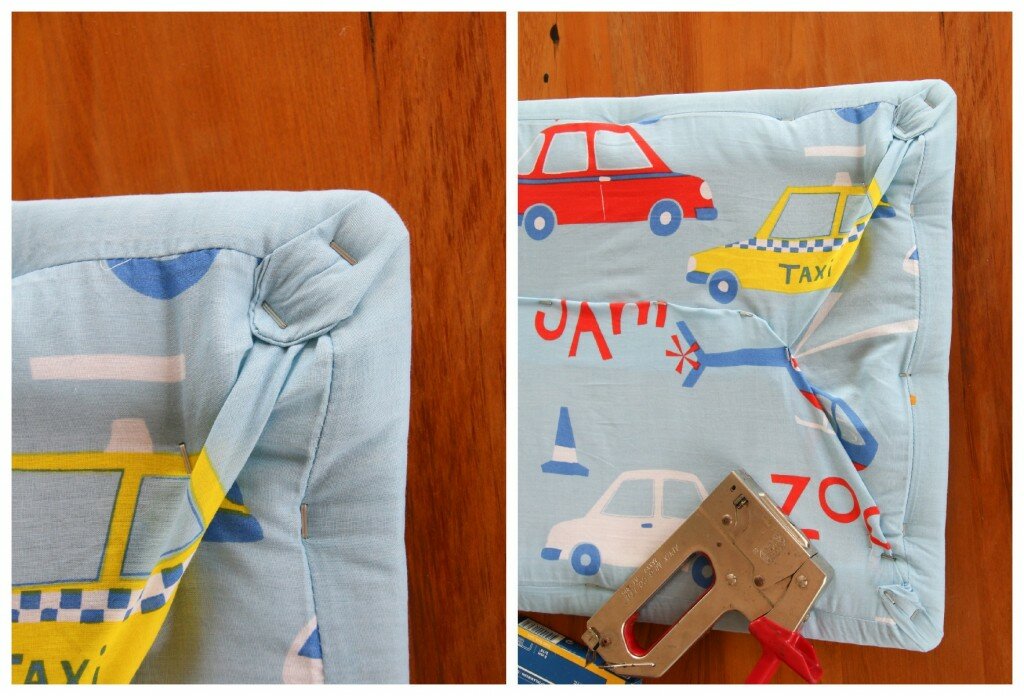
  4. Slide into your pillowcase, insure it is centred (if your pillowcase is like mine you would hate for it to be lopsided or off centred), pull tight and then staple on the reverse side. This is where a second pair of hands comes in “handy” (excuse the pun) again! We stapled the sides first before tidying up the corners, keeping them as flat and neat as possible. diy-pillowcase-wall-art diy-pillowcase-wall-art
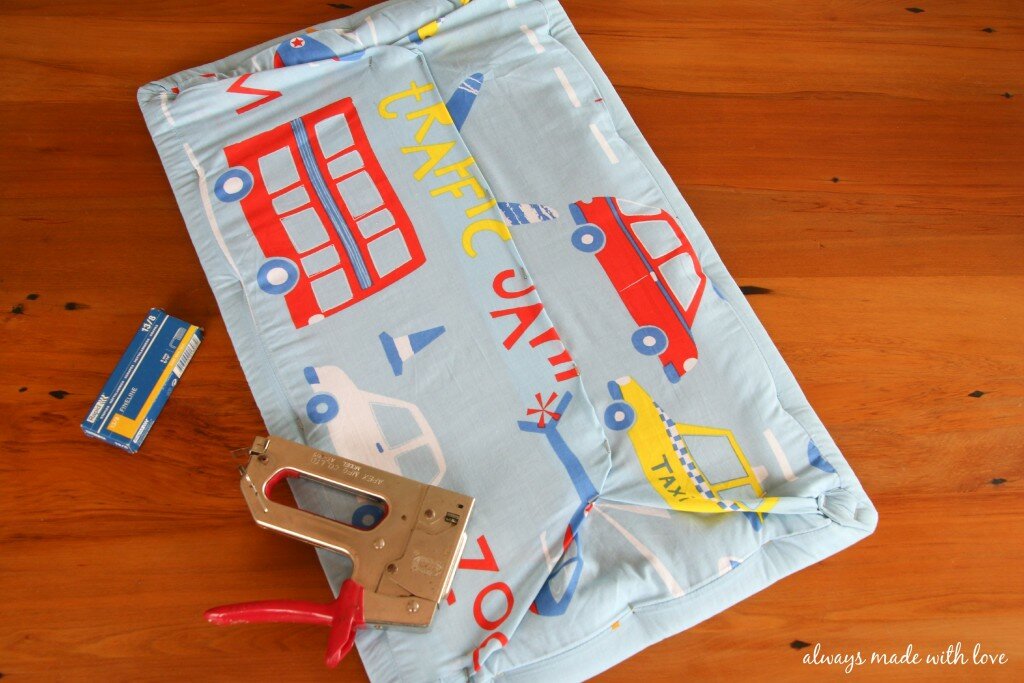
  5. Finally, attach a couple of picture hanging fastenings to the back about 3/4 way up and hang on your wall.

There you have it, your very own piece of custom Pillowcase Wall Art. I am thrilled with how it turned out, (especially as we made it up as we went along) 😉 and I feel like it finishes off Sebastian’s room perfectly, tying in and carrying the whole theme through.

If you haven’t already, take a look at the other things I have created, upcycled or DIY’ed for Sebastian’s Transport Inspired Room –  Shadow Box Houses and Up – Cycled Crates

diy-pillowcase-wall-art

What do you think of the final result? Do you think this is something you would give a go? Tell me.. What artwork do you have on your kids walls?  

signature

  • Twitter
  • Facebook
  • Google
  • Pinterest
  • More
  • Reddit
  • Email
  • Print

Related

«
»

Filed Under: DIY, DIY / Crafts Tagged With: Create, DIY, DIY & Crafts, Home, Home Decor, Home Inspiration, House and Home, Kids Decor, Kids Interior, Kids Room, My Home, Pillowcase Wall Art

Comments

  1. Charlene says

    October 22, 2015 at 3:03 pm

    What a brilliant idea…and so easy!! I wonder if I can find a giraffe pillow case for Master M’s bedroom!! hmmm

    Reply
    • lydiaritchie says

      October 23, 2015 at 3:34 pm

      Isn’t it Charlene! I am sure you would be able to find a giraffe pillowcase somewhere xx

      Reply
  2. Shannon@ my2morrows says

    October 26, 2015 at 1:50 am

    Lydia this is such a genius idea! I love it. Thanks for sharing! Xx

    Reply
    • lydiaritchie says

      October 26, 2015 at 2:46 pm

      Thanks Shannon. Like I said in the post I can’t take credit for it – it was totally my mums idea. xx

      Reply
  3. rons says

    October 26, 2015 at 4:54 pm

    Such a great and simple DIY. LOVE the end result. Well done and very clever. xxx

    Reply
    • lydiaritchie says

      October 28, 2015 at 1:09 pm

      Thanks Maria, I am all for simple, easy and effective! xx

      Reply
  4. Mary-In the boondocks says

    October 26, 2015 at 7:54 pm

    This is such a great idea. An easy way to make wall art for your child’s room without having to spend a fortune. And it will be so easy to switch it out in the future if he wants a change. My kind of frugal decorating!

    Reply
    • lydiaritchie says

      October 28, 2015 at 1:09 pm

      Haha, yip frugal decorating all the way Mary! xx

      Reply
  5. Robyn says

    October 26, 2015 at 8:45 pm

    Great idea on so many levels – practical, economical, personalised, fun. The finished article looks brilliant alongside the matching bed cover. I’d love to give this a go and could only hope I end up with something as good-looking as you have! Visiting via #BlogFair linky

    Reply
    • lydiaritchie says

      October 28, 2015 at 12:59 pm

      Thanks for stopping by Robyn.
      I am sure you would be able too, biggest tip is two pairs of hands (not just so you can take photos along the way) 🙂 They make it so much easier
      .

      Reply
  6. Alison says

    October 27, 2015 at 1:55 pm

    These are so creative! Love it!

    Reply
    • lydiaritchie says

      October 28, 2015 at 12:58 pm

      Thank Alison xx

      Reply
  7. Chelc | Inside the Fox Den says

    October 27, 2015 at 3:44 pm

    What a great idea! And what an awesome way to preserve those memories! Thanks for sharing at Merry Monday, hope to see you again next week!

    Reply
    • lydiaritchie says

      October 28, 2015 at 12:57 pm

      Thanks hun!
      It sure is and fairly easy to change too xx

      Reply
  8. Emma says

    October 27, 2015 at 8:58 pm

    Now this is the kind of wall art I could handle – and it looks great, too! Awesome idea!

    Reply
    • lydiaritchie says

      October 28, 2015 at 12:57 pm

      Hahah… thanks Emma.
      I love how simple and yet effective it is. Plus, you can change it pretty easily too.
      Thanks for stopping by xx

      Reply
  9. Chloe says

    August 16, 2017 at 7:44 pm

    I was just looking to see if anyone had done this already since I have pillow cases laying around that I would love to see more often. I love the idea and my only suggestion is, especially since the pillow case was reversible, cut it in half at the seams (or rip the seams) to be able to have 2 works of art instead of 1. 😉 Great work, I love it!

    Reply

Leave a Reply to Charlene Cancel reply

Your email address will not be published. Required fields are marked *

Welcome! I'm Lydia, the face behind Always Made With Love; wifey to Steve and stay at home mummy to Sebastian and Isabelle. I blog about motherhood, my family, our life, food I love, as well as crafts and the odd DIY. Join me and stay a while xx
  • Email

LATEST ON INSTAGRAM

Saturday, February 10th, 2018 at 9:22am
  • 42
  • 5
Saturday, February 3rd, 2018 at 7:28pm
  • 47
  • 1
Saturday, February 3rd, 2018 at 5:15pm
  • 52
  • 4
Saturday, February 3rd, 2018 at 11:59am
  • 46
  • 1

Sponsors

Isabella Bows

Archives

  • ► 2017
    • ► December
      • From the Munch Cupboard ~ Munch Eco Straws
    • ► October
      • Introducing: Optically.co.nz
    • ► September
      • Toddler Tuesday's at NorthWest
    • ► August
      • Shop Small, Support Local featuring Fox & Child
      • Mid Winter Mexican
    • ► July
      • Shop Small, Support Local featuring Children of the Trees
      • Shop Small, Support Local featuring KP Designs
    • ► June
      • Shop Small, Support Local featuring Owl & Monkey
      • Chux - Helping this Mum clean since 2013
      • Shop Small, Support Local featuring Mud Mates
    • ► May
      • Shop Small, Support Local featuring Only Love
    • ► April
      • Shop Small, Support Local featuring Isabella Bows
      • Relax! I'm Cosy. {Review & Giveaway}
      • Yoghurt Pops
    • ► March
      • Shop Small, Support Local featuring Dream Ruby Boutique
      • Shop Small, Support Local featuring Daisydot
      • Letter to My Little Miss
      • Shop Small, Support Local featuring Silverstone Jewellery
      • Ditching Plastic with Honeywrap
    • ► February
      • SoSimple Skincare Review
      • Summer at the Beach With Kids
    • ► January
      • Summer Berry Semifreddo
      • New Year! New Direction?
  • ► 2016
    • ► December
      • Chocolate Brownie in a Jar with FREE Printable
      • Gingerbread Reindeer Cookies
      • A Giveaway & A Coffee Machine
    • ► November
      • How To Make An Anti Gravity Cake
      • 'Boody' Organic Bamboo Eco Wear || Anything BUT Basic
      • Banana Chocolate Chip Muffins
    • ► October
      • Revitalash Eyelash Conditioner
      • Preparing for Preschool
      • From the Munch Cupboard ~ Munch Lunchbox
      • Who's on Pole? ~ Book Review
      • Preschool
      • Relax with Float Culture
    • ► September
      • Double Chocolate Ice Cream Sandwiches
      • 3 Years With My Little Man
      • Create a Treasure Chest
      • Tot's Pantry ~ Nutritious Meals for Little Tummies
      • Isabelle's Girly Nursery Reveal
      • From the Munch Cupboard ~ Munch Baby Feeder
    • ► August
      • Sachie's Kitchen Meal Kits
      • Honesty. Honestly.
      • I'm Breaking Up With SNAPCHAT
      • Cheese Puffs
      • Go Fish! DIY Fishing Game
      • Having Fun Outdoors this Winter
    • ► July
      • Under the Sea ~ Paper Plate Crafts
      • Dream BIG with 'The BFG' these School Holidays
      • Be Inspired ~ Get Creative!
      • My Thoughts On The Gro-Clock Sleep Trainer
      • 6 Months With My Baby Girl
    • ► June
      • 5 Delicious & Nutritious Toddler (Approved) Lunch Ideas
      • Raspberry & White Chocolate Shortbread
      • Keep Warm & Snuggly This Winter With Babu
    • ► May
      • Julia & Libby's Wholefood Kitchen
      • DIY Car Storage Jars
      • Gaining Confidence With The YMCA Swim School
      • From The Munch Cupboard ~ Munch Baby Feeding Tray
      • Chocolate Bark Bites
      • Mother's Day Gift Tags - FREE Printable
      • Rose Petal Sugar Scrub
    • ► April
      • REVIEW: Golden Month
      • From The Munch Cupboard ~ Healthy Kids Cookbook
      • Isabelle Anne ~ Your Birth Story
    • ► March
      • Making Time For Me
      • Pastel Bunny Canvas
      • Caramello Filled Easter Cupcakes
      • Life is an Adventure
    • ► February
      • DIY Woven No-Sew Pillow
      • Vanilla and Green Tea Oatmeal Face Scrub
      • Meal Planning for the Busy Mum with FREE Printable
      • Easy DIY Magnetic Scrabble Chalkboard
    • ► January
      • Quick & Easy DIY Letter Décor
      • Play Idea ~ Summer Snow
      • Top 5 Tips for Travelling with a Toddler
      • Welcome Isabelle Anne
  • ► 2015
    • ► December
      • Mini Chocolate Christmas Puddings
      • Time for a Break
      • From the Munch Cupboard ~ Munch Eco Hero Baby Cup
    • ► November
      • REVIEW: Organic Care Package from Tigs & Boo
      • From the Munch Cupboard ~ Natural Wooden Baby Teething Necklace
      • REVIEW: Keeping My Kitchen Clean With Dettol
      • REVIEW: Eardrop's Journey: Sounds of the City
      • REVIEW: Comfort Food by Simon & Alison Holst
      • REVIEW: The Rabbit Who Wants to Fall Asleep
      • Children's Artwork Display
      • Pink or Blue? Old Wives' Tale Gender Predictions
      • Grown Ups Go Free with Kellogg's
      • 4 in 1 Nursing Pillow
      • Up-Cycled Wooden Crates
      • Thomas Themed Birthday Cake
      • A Simple Butter Cake
      • Chocoholic Choccie Cake
    • ► October
      • Lil Gooseberry ~ 32 Week Update
      • SNUGPOD - the perfect swaddle every time!
      • DIY Pillowcase Wall Art
      • REVIEW: Educational Colours Art and Craft Range
      • Toddler Fun ~ Threading
      • REVIEW: Finish Quantum Max
      • Transport Inspired Boys Bedroom
      • REVIEW: Funky Giraffe Bandana Bibs
      • Sebastian's 2nd Birthday ~ A Thomas Party
      • Lil Gooseberry ~ 28 Week Update
    • ► September
      • Two Years With My Little Man
      • A Serious Case Of Baby Brain
      • Hacked! Shadow Box Houses
      • REVIEW: Pineapple Heads Bath Time Products
      • Red Velvet Cake With Cream Cheese Icing
      • Creating Smiles With Allen's
      • Lil Gooseberry ~ 24 Week Update
      • Lil Gooseberry ~ 20 Week Update
      • DIY Sharpie 'Scribble' Mugs
    • ► August
      • This Is Me ~ The Face Behind Always Made With Love
      • Pushing Pause
      • Super Fun & Easy DIY Bubble Art
    • ► July
      • Ducks To Water
      • Decadent Cadbury Jaffa Slice
      • Jelly Tip Cheesecake Truffles
      • Key Lime Pie
      • Help! The Wolf is Coming!
      • Lil Gooseberry ~ 16 Week Update
    • ► June
      • Peppa Goes On Holiday
      • 21 Months of Cuteness
      • Coconut Loaf
      • Baby # 2 ~ The Details
      • Watties and Heinz Little Kids Range
      • Something A Little Bit Special...
    • ► May
      • Always Made With Love Turns ONE
    • ► April
      • 20 Facts
      • More Toys! Less Fun?
      • Buzzy Bee Books
      • Salami, Pesto & Mozzarella Muffins
    • ► March
      • 18 Months of Cuteness
      • Easter Bunny Treat Jars
      • DIY Baby / Toddler Swing
      • The Birthday Monster by Bridget Sherlock
      • Upside-down Plum Cake
    • ► February
      • 17 Months of Cuteness
      • Five Days Left By Julie Lawson Timmer
      • Sleep ~ Transitioning From Two Naps To One
      • Roasted Strawberries
      • Kiwi Mummy Blogs Review ~ Recipes For Messy Play
      • Birth Keepsake Wall Art
    • ► January
      • Roast Cherry Tomato & Spicy Chorizo Pasta
      • 16 Months Of Cuteness
      • Sebastian's Nursery
      • SHINE Blog Hop
      • My Goals ~ 2015
      • It's Official.. I'm Back
      • Hello 2015
  • ► 2014
    • ► December
      • Our Christmas ~ 2014
    • ► November
      • 14 Months Of Cuteness
      • My Favourite Chocolate Chip Cookies
      • Moroccan Lamb Burgers
      • ...And Schumi Makes Five
      • Piggy Pasta And More Food With Attitude
    • ► October
      • Bubba Bites - Muesli Teething Biscuits
      • Letter To My Little Mister
      • Sebastian's 1st Birthday Cake Smash
      • Bolognese Pinwheels
      • Lemon Coconut Slice
      • Kiwi Mummy Blog Review ~ Pic's Really Good Peanut Butter
    • ► September
      • Looking Back ~ The Early Days
      • Strawberry Ice Cream Tart
    • ► August
      • 11 Months Of Cuteness
      • Bubba Bites
      • Zzzz... Sleep
    • ► July
      • 10 Months of Cuteness
      • 9 Months of Cuteness
    • ► May
      • 8 Months of Cuteness

Copyright

I love it when you share. Please note all images and text on this site are property of Always Made With Love. You may use one or two photos, provided you link back to my original post. Please do not crop, edit or remove watermarks from any of my images, without obtaining permission from me first. Thank you!

Copyright © 2018 · Always Made With Love · Sprinkle theme by Restored 316

loading Cancel
Post was not sent - check your email addresses!
Email check failed, please try again
Sorry, your blog cannot share posts by email.