I am really lucky in the fact that Sebastian loves food and is a really good eater. However, recently I had lost all sorts of inspiration when it came to making lunches. I had fallen into the routine of making the same thing everyday.
I’ve spent a bit of time this last week thinking how I can revamp our lunches. I say “our” because at the end of the day I like to eat lunch with Sebastian, and the easier that is to achieve the more likely it happens. I also wanted to come up with lunches that were delicious, nutritious and fun. They needed to be easy to prepare (either in advance) or on the day, because Murphy’s law if I had grand plans of making something difficult then our day would turn to custard and we would fall back into the same old same old.
Below are 5 Delicious & Nutritious Toddler Approved Lunch Ideas that I have started using on a regular basis:
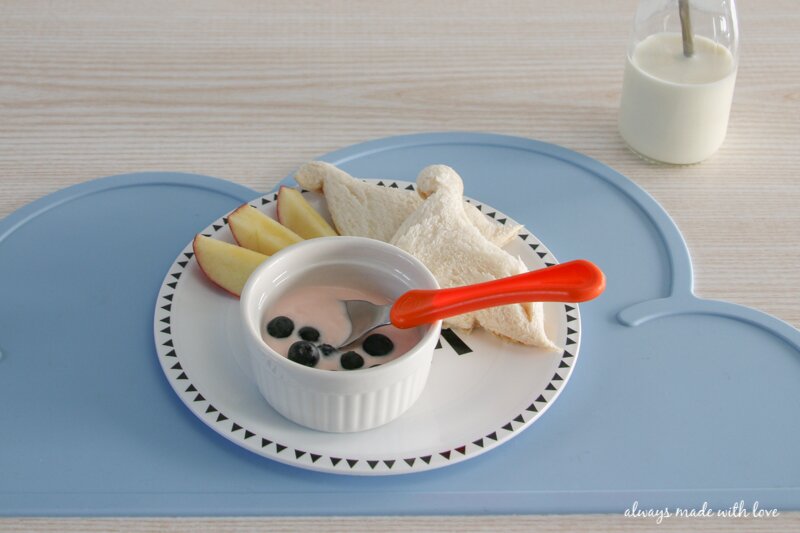
 Lunch # 1 – Good Old Sandwiches (these still play a key role in our lunches, they are our go to, our staple). I try to include a variety of fillings from Marmite / Peanut Butter / Ham & Cheese / Egg / Tomato – whatever your child enjoys! Just ask them what they feel like today, and you’ve got a better chance of it being consumed. It helps to mix up the way you cut them too… Get creative!
 Lunch # 2 – Toasted Sandwiches – Perfect for those cold Winter days. Cheese / Marmite & Cheese / Tomato Relish & Cheese are some or Sebastian’s favourites and are yummy, warm and toasty. Make sure you let them cool down a little before serving, especially when any tomato is involved!
 Lunch # 3 – Pinwheels – These are a recent addition to our lunches and Sebastian loves them as they remind him of Sushi and this two year old loves Sushi! They are super easy to make. Simply spread a wholegrain tortilla or wrap (whatever you like to call them) with filling of choice. We are enjoying cream cheese and ham in ours at the moment. Roll up and wrap in plastic wrap, at this point it is best to put them in the fridge for a little bit to chill before slicing. Perfect for on-the-go too!
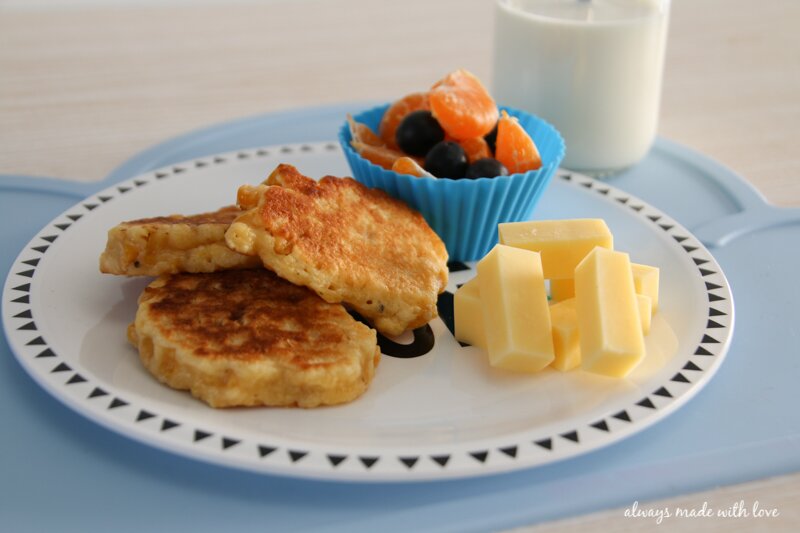
 Lunch # 4 – Corn Fritters – These are a Daddy special, they are usually an easy Sunday night dinner (which I take full advantage of and pop a couple aside for lunch the following day), WIN! Below is the winning recipe Daddy uses 🙂
- 3/4 cup plain Flour
- 1 teaspoon Baking Powder
- Salt and Pepper to taste
- 1 Egg
- 440g can of cream-style corn
- Oil of choice for frying
- Sift flour, baking powder into bowl, adding salt and pepper to taste
- Add egg, cream-style corn and any other vegetables. Stir to combine
- Heat oil in frying pan. Drop tablespoonsful of mix into pan (careful not to over crowd. I like to do 3 or 4 at a time tops)
- Cook until golden, then turn and cook other side. Drain on paper towels
- Serve hot (warm if you have children) with your choice of sauce
- I find these fritters are a great way to get hidden vegetables into Sebastian, simply add chopped onions or peppers; grated carrot or courgette at the same time as the corn
- Ensure you squeeze excess moisture out of the grated veges to stop the mix from going soggy
- If having these Corn Fritters for dinner we like to serve with a side of bacon - yum!
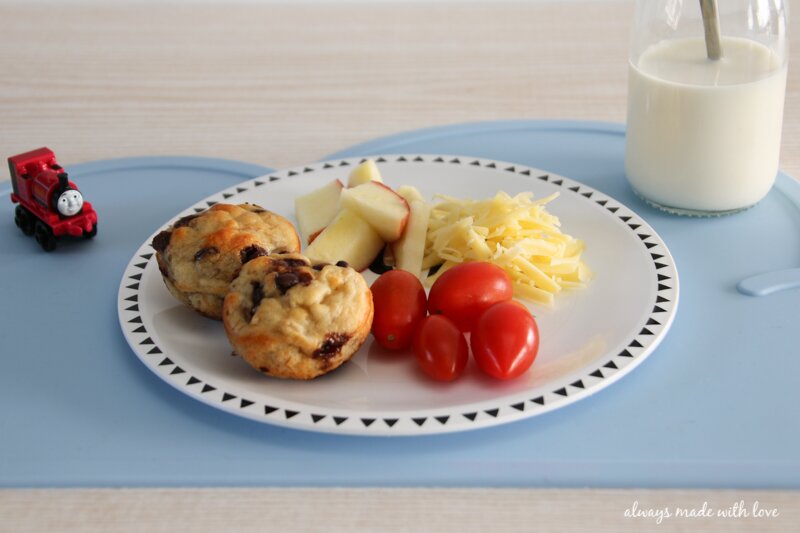
 Lunch # 5 – Mini Muffins – Another great one to make ahead, they can even be popped in the freezer and whipped out just on lunch time; by the time everything else is ready they have thawed out. I find they are another great way to sneak fruit and vegetables into your little one – cheese muffins work a treat and banana muffins are well just plain yummy! Here are my go-to recipes for Cheese (Savoury) Puffs and Banana Muffins – both a firm family favourite.
- 2 cups of Cheese (whichever you have in your fridge is fine)
- 2 cups of Flour
- 2 cups of Milk
- 4 heaped teaspoons Baking Powder
- Salt and Pepper to taste
- In a large bowl, mix together all ingredients until just combined
- Spoon into greased muffin tin
- Bake at 180 degrees Celsius for 10 -12 minutes until golden
- Perfect when made in mini muffin tins too
- Another great way of sneaking vegetables into something yummy
- These Cheese Puffs also work well with the addition of bacon, tomato and onion
- 1 1/2 cups plain Flour
- 1 1/2 teaspoons Baking Powder
- 1/4 cup White Sugar
- 60 grams Butter
- 2/3 cup mashed Banana (approx. 2 Bananas)
- 1 Egg
- 1/2 cup Milk
- Sift flour and baking powder, add sugar and mix to combine
- Rub butter into dry ingredients until mixture makes fine breadcrumbs
- Stir in mashed banana, egg and milk
- Spoon mixture into greased tins
- Bake at 190 degrees Celsius for 18 - 20 minutes
- Leave in tins for 5 minutes before cooling on a wire rack
- Chocolate Chips can be added in at some time as Banana (either white or dark work wonderfully)
- These can be made in mini muffin tins - they are the perfect size for little fingers
- Work well from the freezer, either defrost naturally or warm through in microwave
As you can see each meal is paired with a variety of fruit and vegetables, eggs, cheese or yoghurt. These can all be mixed and matched to what ever your child enjoys; what’s in season and more importantly what’s in the fridge or pantry.
Some things I try to adhere to now when preparing our lunches..
- Mix it up – as I have said before sandwiches are still a part of our lunches, I have now just included some other yummy options to my lunch time repertoire.
- Colours of the rainbow – I know it can be hard to serve purple and blue foods however my point here is to serve a variety (mandarin one day, apple the next).
- Make the most of what is in season i.e. strawberries and stone fruit are plentiful in Summer so add them into lunches.
- Serve small amounts (bite sized) – Sebastian is less overwhelmed when he has small amounts, plus he seems to eat more too.
- Make it fun – use cookie / sandwich cutters to cut sandwiches into shapes, use silicone cupcake cases and small bowls or plates make lunchtime fun, add in some fun spoons or food picks to eat with.
Finally, I like to serve lunch with a glass of milk. This way I know he is getting at least one of his daily servings of calcium, boosting his immune system and alongside his lunch am setting him up for an afternoon full of running, jumping & playing.
Recently, Munchkin has released a new formula to the market.
A formula which is made with only the best, and highest quality milk in the world. Milk that is made right here in New Zealand from 100% grass fed cows. A great alternative when breast is not an option. Munchkin knows breast milk is best, but for families who choose to supplement or bottle feed their babies, new munchkin grass fed formula is the best you can buy because it comes from such high quality milk.
Grass fed milk is healthier than grain fed milk. It comes from cows who year on year only eat grass and plants, just the way nature intended it to be. By doing this they are able to produce the ‘richest, most natural and best tasting milk in the world.’ So a better diet for the cows means better milk for your precious wee one.
It contains the proper balance of fatty acids plus vitamins, nutrients and protein. Munchkin’s grass fed dairy cows are raised free from harmful, unnatural growth hormones and steroids, and the milk in our formula is completely free of GMOs – a big WIN if you ask me.
As a Mum, it is important to know where the food I give my little ones comes from and formula is NO exception to that rule. I want to know that I am giving my children the BEST start to life and the BEST is Grass Fed formula.
Want to try the new Munchkin Grass Fed Formula yourself? You can find it here. Be sure to check out their Website and page for more information and for the latest in parenting news.


**This is a sponsored post written by me on behalf of Munchkin Grass Fed Formula; all thoughts and opinions are my own**
Great recipes Lydia! I am definitely going to make those cheesy puffs this weekend – perfect for the kids lunches.
Thanks for linking up with us at Friday Favourites.
They really are yummy Charlene – hope you and the kids liked them xx
such a great post, I will def try some of these with my toddler 🙂