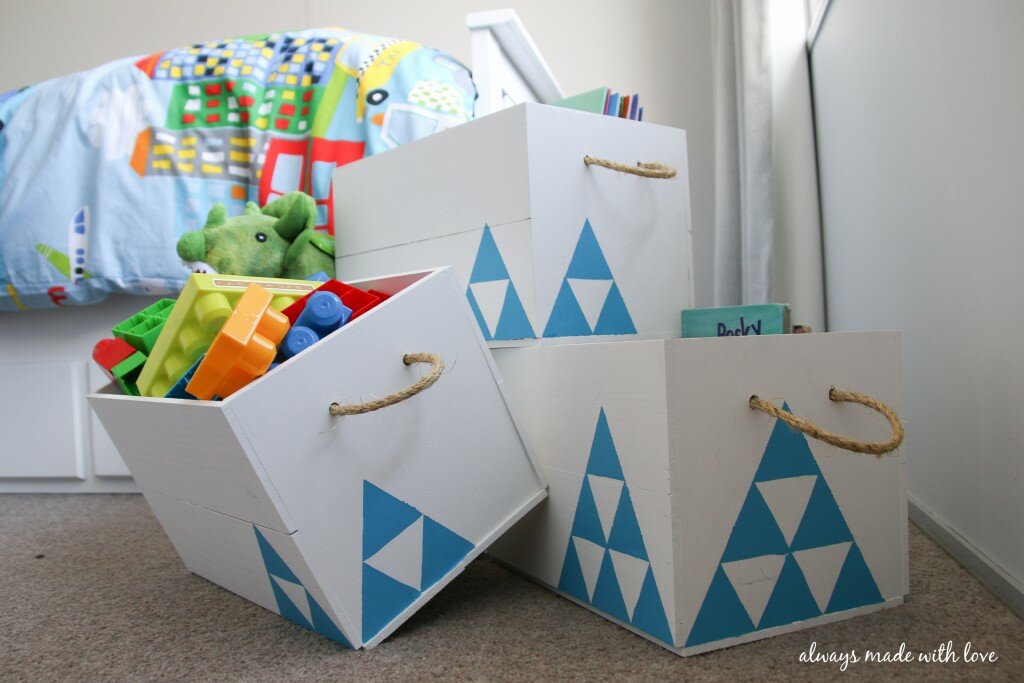
 A little on a month ago I shared with you Sebastian’s Transport Inspired Boys Bedroom. At the time I shared his room I mentioned how I had spent the months leading up to the move creating, upcycling and DIY’ing various items in his room to personalise it and make it his own. Today, I am sharing another one of my little projects with you…
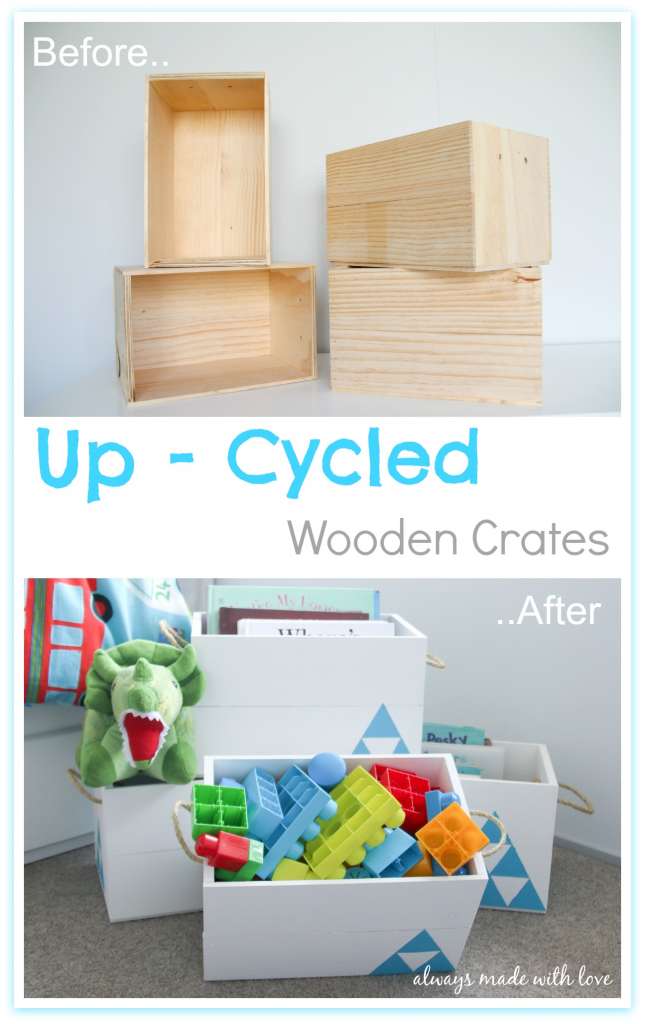
One of the things I did for his room was ‘up cycle’ so to speak four wooden crates for toy and book storage. Now there was nothing wrong with these crates, in fact I scored them for a bargin off Trade Me. They were brand new and the perfect size for the space I had plus not too big and heavy that Sebastian wouldn’t be able to handle them. They were just boring. Plain timber boring. However, nothing that I didn’t think a coat of paint, some love and care, a bit of rope and creativity couldn’t handle 😛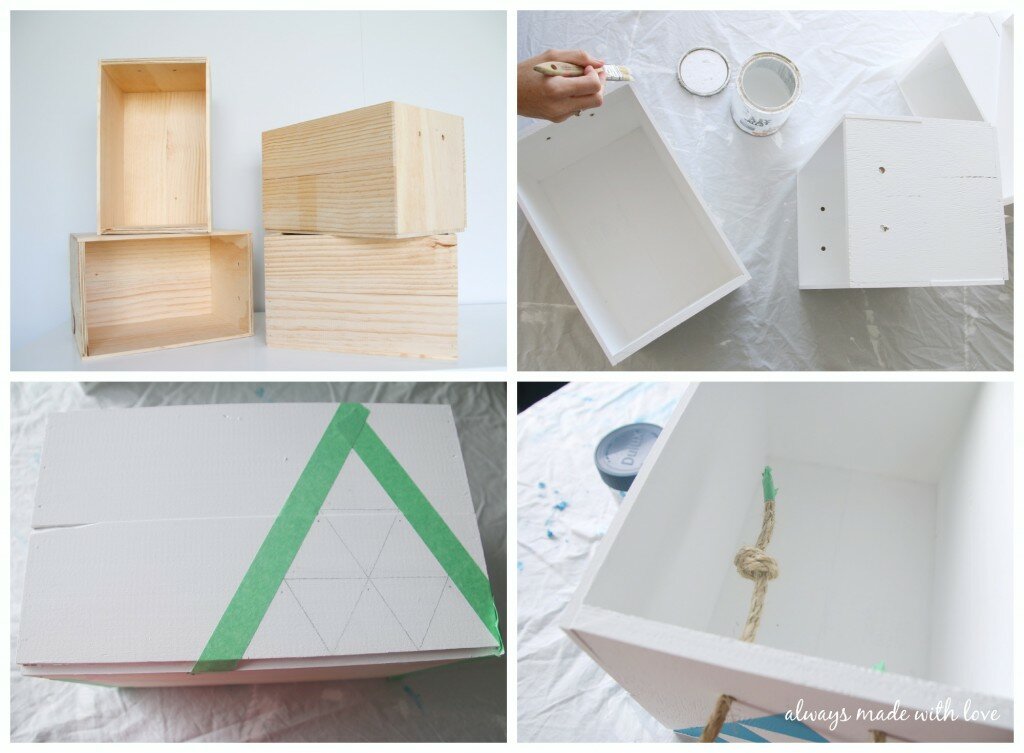 First things first, they needed a change in colour, boring wood was not going to cut it (at least not for the vision I had in mind). Like the Shadow Box Houses I started with a base of white both inside and outside to lighten, brighten and freshen them up. Plus, it gave me a blank canvas to work with. I lightly sanded them and applied a couple (more like 3) coats of white paint. I used PPG Architectural Coatings Easy Coat in flat white, same as those houses. It’s a nice bright, clean white paint with no yellow or grey undertones. This automatically changed the look and feel of the crates.
Next it was on to being creative (marginally). I wanted to add ‘something’ to the sides of the boxes to bring the colour through and make the crates a bit more fun. So one quiet afternoon during naptime I sat down with a bit of paper and started playing with shapes. As you can see I finally settled on triangles and came up with a bit of a pattern, (nothing hugely complicated, simple and easy). One thing I like about this sort of creativity is it can be changed, as and when Sebastian’s tastes and room décor changes. a few coats of paint and a completely new look.

 So armed with a pencil, for drawing the pattern; some masking tape, for the main edges; my colour of choice (Lake Coleridge – such a bright, vibrant blue) and a couple of brushes, I set out to paint my chosen pattern on the sides. I kept chopping and changing between a teeny tiny brush for the edges and a bigger flat one for the inside bits. It was a bit fiddly but I got there in the end and it only took one naptime 🙂 Plus, Steve helped me with drawing the pattern on the sides before I took the reins (paint brush) and did the rest of it. I only needed to apply one coat for the pattern so it was nice and quick to dry as well.
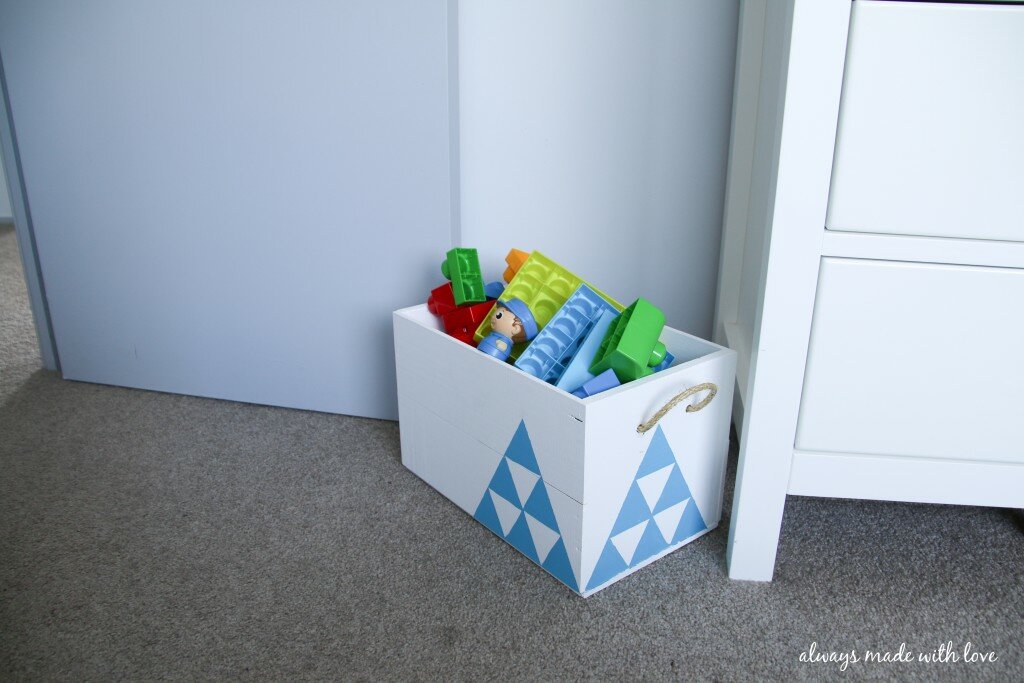
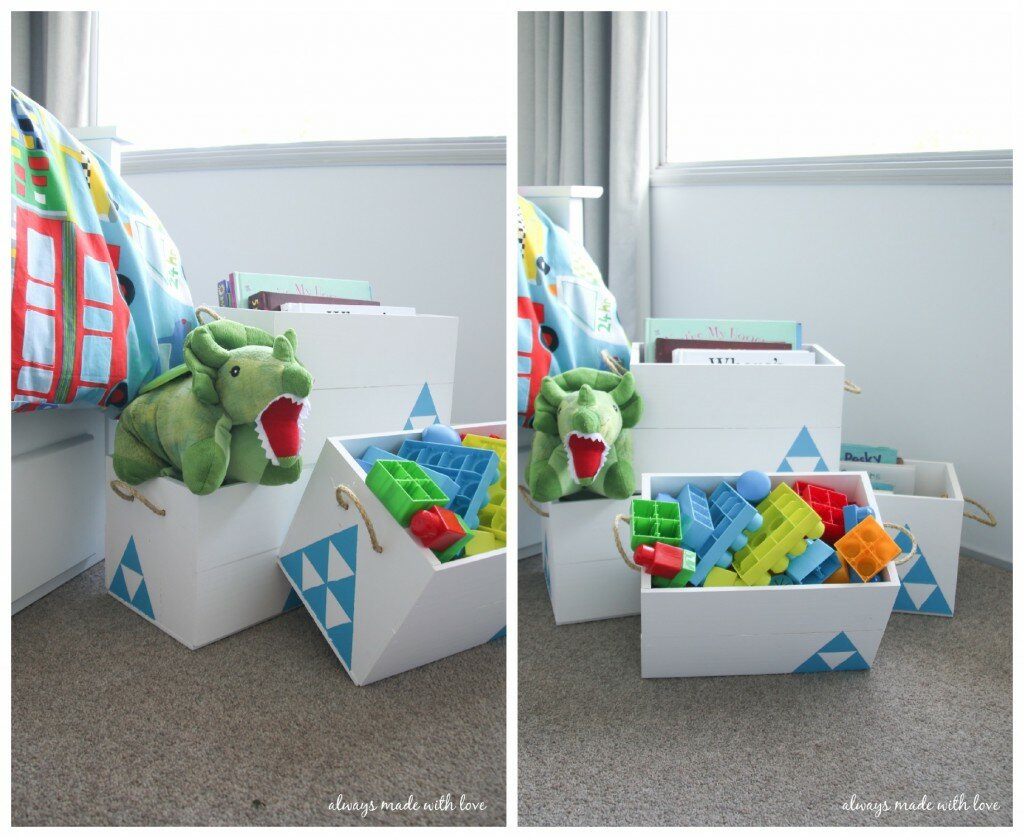
Once dry I added some rope handles to the crates. Ok, I got Steve to add some rope handles to the crates (for no other reason than I was running out of time with other bits and bobs I was trying to do and he offered to help). And there you have it, four completely revamped, up cycled crates now perfect for storing toys and books in a two year olds room!
If you haven’t already, take a look at the other things I have created, upcycled or DIY’ed for Sebastian’s room – Shadow Box Houses and Pillowcase Wall Art .
What do you think of the ‘up-cycling’ I did on the crates for Sebastian’s room? Have you completed any DIY / Up-cycling projects lately? Do share..

These are awesome! Such a great idea Lydia <3
Thanks Tegan!
I am not overly creative but throwing some paint around, now that I can do 🙂 xx
Lydia, these are GORGEOUS!!! I am loving Sebastian’s room – so many cool ideas. Love the crates. Well done Mama.
Thanks Charlene!
I have had so much fun putting all the bits and pieces together for it 🙂 xx
There’s nothing quite like paint to add interest! I recently painted my boys’ bookcase and toybox in matching orange. They look fabulous! #TeamIBOT
You are SO right Bec, a new paint job and it can completely transform things. Plus it is an easy was of changing things to grow with your family xx
Just a little paint does wonders. Your crates turned out really pretty, and make such great storage. Love the simple design. Thanks for sharing!
They look awesome! What a great job you’ve done.
Those look amazing! I love that they even seem easier enough for me to try, lol!
What a great idea! The simple colours you used with the touch of blue look really cool. I love that you used them for toy and book storage too! Thanks for sharing – i’ve pinned to my DIY board 🙂
Thanks Hun!
Sometimes the simpler the better, I think. Plus they can be changed as he gets older 🙂
Popping over to check your blog out xx
What a great job, Lydia! Sebastian is a lucky boy. I love the simplicity of the pattern – very masculine but cute at the same time. This was one of our most popular posts on this week’s Blog Fair
Thanks Karen.
I am always amazed a what a difference a coat of paint can make to things 🙂 xx